728x90
https://react-kakao-maps-sdk.jaeseokim.dev/
Hello from react-kakao-maps-sdk docs | react-kakao-maps-sdk docs
Description will go into a meta tag in <head />
react-kakao-maps-sdk.jaeseokim.dev
next에서는 react-kakao-maps-sdk라는 라이브러리를 쓰는게 가장 간편하다
npm i react-kakao-maps-sdk먼저 라이브러리를 설치한 후
https://react-kakao-maps-sdk.jaeseokim.dev/docs/setup/next
Next.js | react-kakao-maps-sdk docs
No Sync Scripts
react-kakao-maps-sdk.jaeseokim.dev
위 문서 내용처럼 _document.tsx나 layout.tsx쪽에 선언해주는 방식도 있지만
client side에서 쓸거기때문에 난 useKaKaoLoader를 사용해서 호출해줬다
  const [loading, error] = useKakaoLoader({
    appkey: "발급 받은 APPKEY",
  });
발급받은 키는 카카오개발자사이트에 들어가서 로그인하면 등록한 앱에 javascript key가 있을것이다
그걸 넣으면된다
const Map = () => {
	return (
    <>
      {loading ? (
        <div
          style={
            display: "flex",
            justifyContent: "center",
            alignItems: "center",
            width: "100%",
            height: 200,
          }
        >
          <Loading color="#111aff" background="dark" />
        </div>
      ) : (
        <div className={styles.map}>
          <Map // 지도를 표시할 Container
            center={
              // 지도의 중심좌표
              lat: map.x,
              lng: map.y,
            }
            style={
              // 지도의 크기
              width: "100%",
              height: "200px",
            }
            level={3} // 지도의 확대 레벨
          >
            <MapMarker // 마커를 생성합니다
              position={
                // 마커가 표시될 위치입니다
                lat: map.x,
                lng: map.y,
              }
            >
              <div className={styles.fin}>{name}</div>
            </MapMarker>
          </Map>
        </div>
      )}
    </>
  );
}
return값으로 loading중이면 미리 만들어둔 Loading 컴포넌트를 호출하고
로딩이 완료되면 맵이 뜨게 만들었다

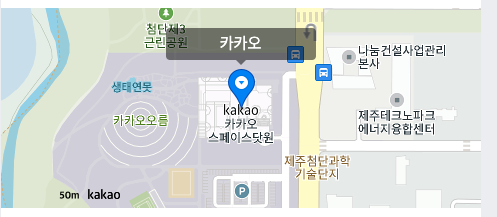
그럼이렇게 완성
네임택 css 정보는
    .fin {
      background-color: rgba(0, 0, 0, 0.5) !important;
      color: #fff;
      border-radius: 4px;
      text-align: center;
      padding: 8px 0;
      width: 150px;
      position: relative;
    }
    .fin::after {
      border-top: 5px solid rgba(0, 0, 0, 0.5);
      border-left: 5px solid transparent;
      border-right: 5px solid transparent;
      border-bottom: 0px solid transparent;
      content: "";
      position: absolute;
      bottom: -5px;
      left: 50%;
      transform: translate(-50%, 0);
    }
이렇게주면 투명말풍선이 만들어진다
728x90
'JS > Next.js' 카테고리의 다른 글
| React(CSR)가 아니라 Next(SSR)을 하는 이유! SEO에 대해 알아보자 (2) | 2024.06.04 |
|---|---|
| Next.js에서 axios interceptors 적용하는 방법 + rewrite (1) | 2024.06.04 |
| vercel에 next.js를 배포했는데 느리다.. 유료결제까지했는데 느리다.. (0) | 2024.04.09 |
| Static Rendering, Dynamic Rendering (0) | 2024.02.28 |
| Next 에서 Server component와 client component (0) | 2024.02.28 |
